CAR BUMPER REPAIR - Making handles part2
06-12-2021
0
Contemporary mixtures used for the production of bumper fillers, which will be the main character of this article, are mainly PP / EPDM with various types of fillers (talc, elasticizers, glass fiber) in the case of mid-segment brands or PUR (high-density polyurethane) in the case of premium brands.
In the 1980s and 1990s, the range of mixtures used for the production of plastic elements was much narrower and such manufacturers as, for example, Volkswagen used, among others, ABS material for this type of elements. It was an unsuccessful choice, because the material loses its elasticity over time and tends to stress corrosion as a result of external chemical factors.
Such factors were applied to the repaired and described in this article the front bumper extension to the Volkswagen Vento, manufactured by the OEM manufacturer based on ABS plastic. The element had a number of cracks of various lengths, material losses in the form of deep grooves in the walls of additional elements, missing mounting brackets and no end reinforcement.

VW Vento OEM front bumper spoiler
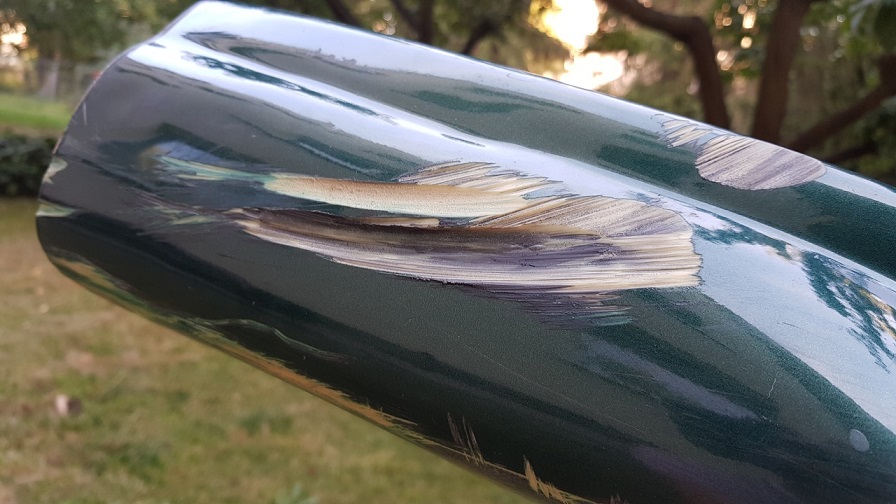
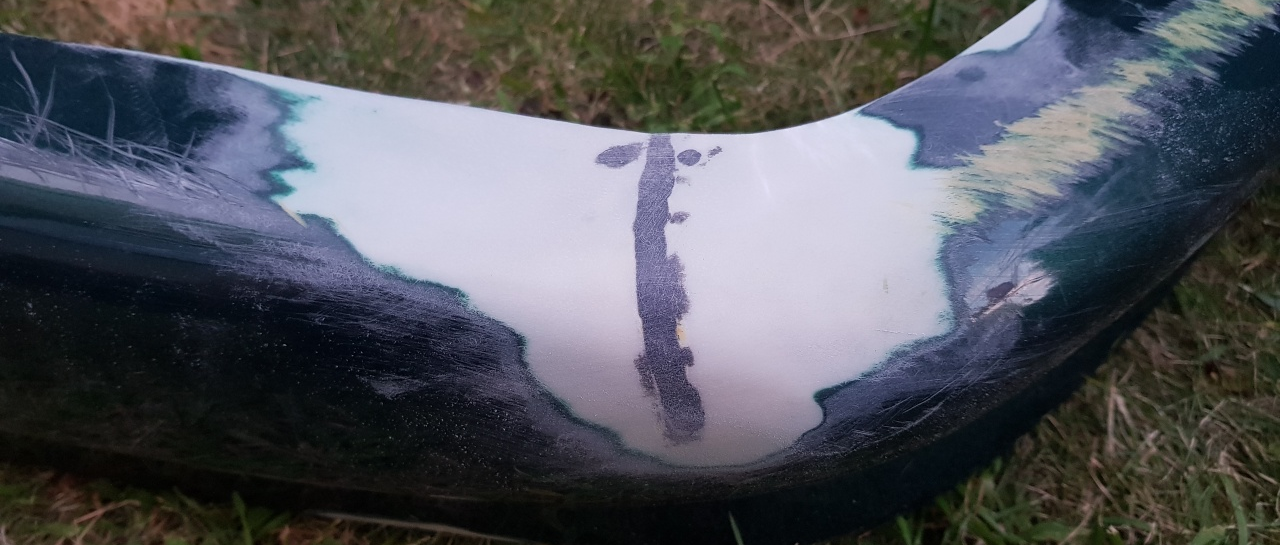
Groove in the outer surface of the add-on element - Material loss
The repair of all damage began with the initial decontamination of all surfaces to be repaired using a 99% IPA solution. Cleaning the surfaces prior to further processing prevents contaminants from penetrating into the material, which could reduce the adhesion of the binder to the part being welded.
The next step was to remove all elements used in previous repairs, such as clamps, steel mesh or glue not intended for ABS.
Then, the varnish surface and primer were removed from the surface of the add-on by grinding with an eccentric sander and low-grade sandpaper within the range of 80-120. The use of such a low gradation of sandpaper allows for quick removal of unnecessary material and deburring the surface, which increases the adhesion of the binder to the welded material.
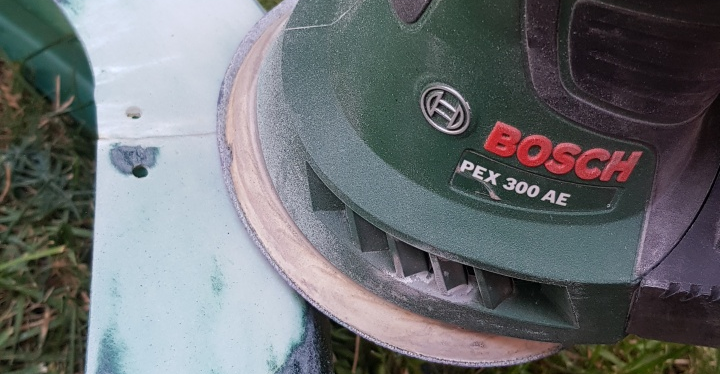
Grinding the welded surface using an eccentric grinder.
After grinding the surfaces to be welded, the surfaces were cleaned again with the use of IPA solution to remove the remains of varnish and polished plastic from the surface of the element.
The last step before starting the actual welding is milling the welding groove, on the surface of which the target weld will be placed. In the case of plastics, there are two shapes of welding grooves:
• Triangle-shaped groove - Most often with an angle of 60-90 degrees which is ideally suited to the triangle-shaped binder
• A semicircular groove with rounded corners - Used most often for larger surfaces, where it is possible to place a weld based on a strip-shaped binder
In the case of the presented add-on, mainly a strip-shaped binder was used, so the milling of the groove in the shape of a half-circle was used. The milling of the groove was done with a cylindrical cutter with a semicircular end as shown in the photo below:
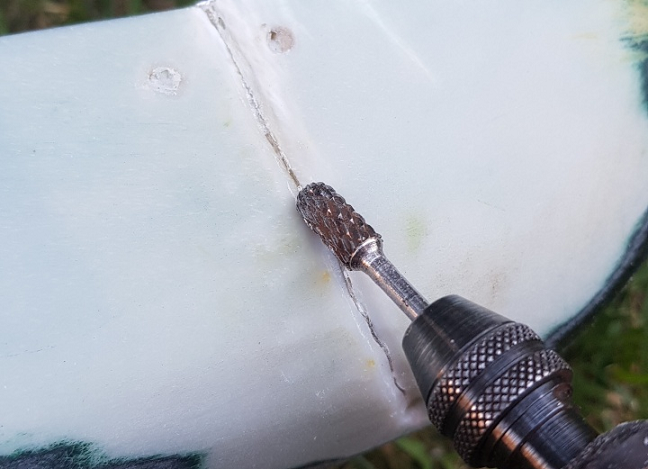
Cylindrical cutter with a semicircular end mounted in a mini grinder
After milling the groove, the material was properly welded, i.e. in this case pure ABS (Acrylonitrile-Butadiene-Styrene) mixture with the ABS-U binder.
The welding parameters in this case are 335 degrees of airflow temperature and medium airflow (4.5 / 8) from the AT-852D + welding machine.
As ABS plastic is very easily deformed in the event of prolonged exposure to high temperature, it is recommended to stick the inside of the element with aluminum tape that supports the shape of the element and prevents its deformation during welding.
When welding cracks, it is important to follow a few basic rules:
• Both the welded material and the binder must be simultaneously heated by blowing hot air so that they can be plasticized at the same time. The exception is when the thickness of both materials is different - Then we heat the material of greater thickness more;
• Press the binder to the welded surface with appropriate force - The pressure should be strong enough that the binder, under the pressure and blowing force, will arrange itself in the welding groove;
• Keep the binder perpendicular to the welded surface as much as possible or slightly tilted backwards in relation to the material (angle 60-90 degrees).

Recommended angle of the binder in relation to the welded surface
After the surface is welded and ground with sandpaper, the welded surface should look similar to the photo below:
Welded crack in the corner of the add-ons and holes after drilled holes filled in
To fill deeper cavities in this type of material, we can use a strip-shaped binder and fill the cavities by applying as many strips to obtain filling plus a slight protrusion of the material above the welded surface. This will allow for grinding the welded surface to obtain the desired shape without the need for excessive filling of the element after welding.

Filling the cavities with an ABS binder in the form of a strip (view after grinding)
As the second part did not have several mounting brackets, it was necessary to make them from scratch. A great facilitation was the fact that the additional part had mirror handles on which you could base and make appropriate measurements of dimensions.
A flat plate made of ABS regranulate was used as the basis for rebuilding the handles. Appropriately sized pieces were cut from the board, from which the mirror mounting brackets were ground. To obtain the final shape, you can use both cutters and sandpaper on a roller (used for micro sanders).
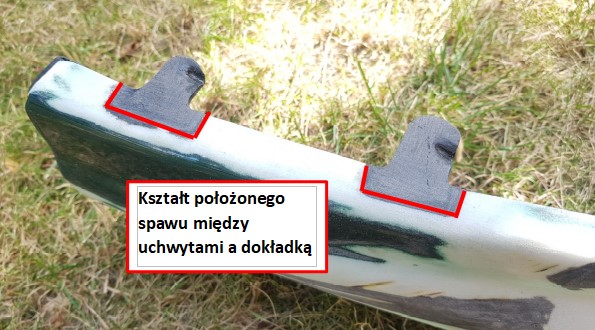
Welded in addition to the additional mounting brackets with appropriate geometry and marked places of welds
In order to obtain specific depressions in the mounting brackets, which are also the surfaces that block the additive in the bumper, the surface of the handle was heated to the ABS melting point, i.e. about 320 degrees, and then the surface deformation was formed with a tool such as a screwdriver, flat bar, etc.

The final shape of the mounting clip with the indication of the force deforming the shape of the mounting clip
The last part of the repair was to make a piece of end reinforcement for the add-on, which was made of a piece of ABS plate. To easily cut a piece of plate in a shape that will fit the end of the topper, a simple method was used:
The end of the topper was brought to the surface of the plate and the missing internal shape of the fragment was drawn with a soldering iron as an outline.
The missing part was cut out with a cutting disc for plastics, e.g. Dremel, in order to obtain the greatest possible contour accuracy. In order to precisely match the shape of this fragment, it was corrected with milling cutters on a micro-grinder.
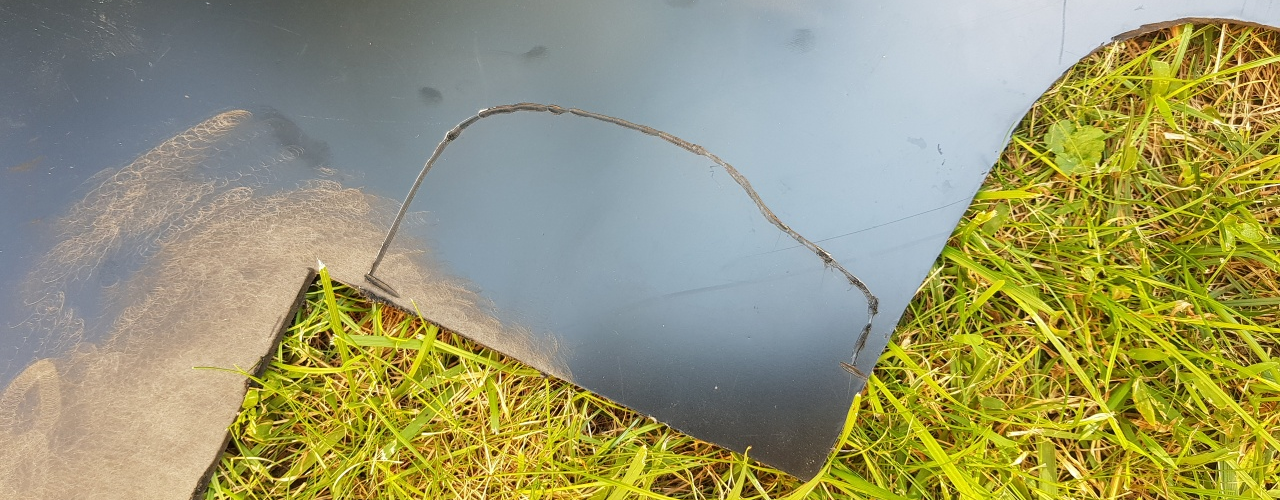
The inner contour of the missing fragment of the additional reinforcement
After the appropriate fragment has been cut out, we can start welding it in addition to it using a binder with a triangular cross-section, which is very good for creating fillet binders. The final effect after processing the weld is shown in the photo below:

Correctly welded and machined missing piece of bumper reinforcement
Autor: Adam Dmitriew (@6Nylon)
Comments