Car bumper repair - broken hooks
06-12-2021
0
In the process of assembling a finished product made of plastic, such as a complete front bumper of a passenger car, various elements are often joined together.
Apart from the shell itself, the bumper also includes various additional elements, such as decorative strips, grills, reinforcements, assembly slides, washer covers, etc.
Reconstruction and surfacing of assembly welds in a car bumper.
Element: Renault Clio I
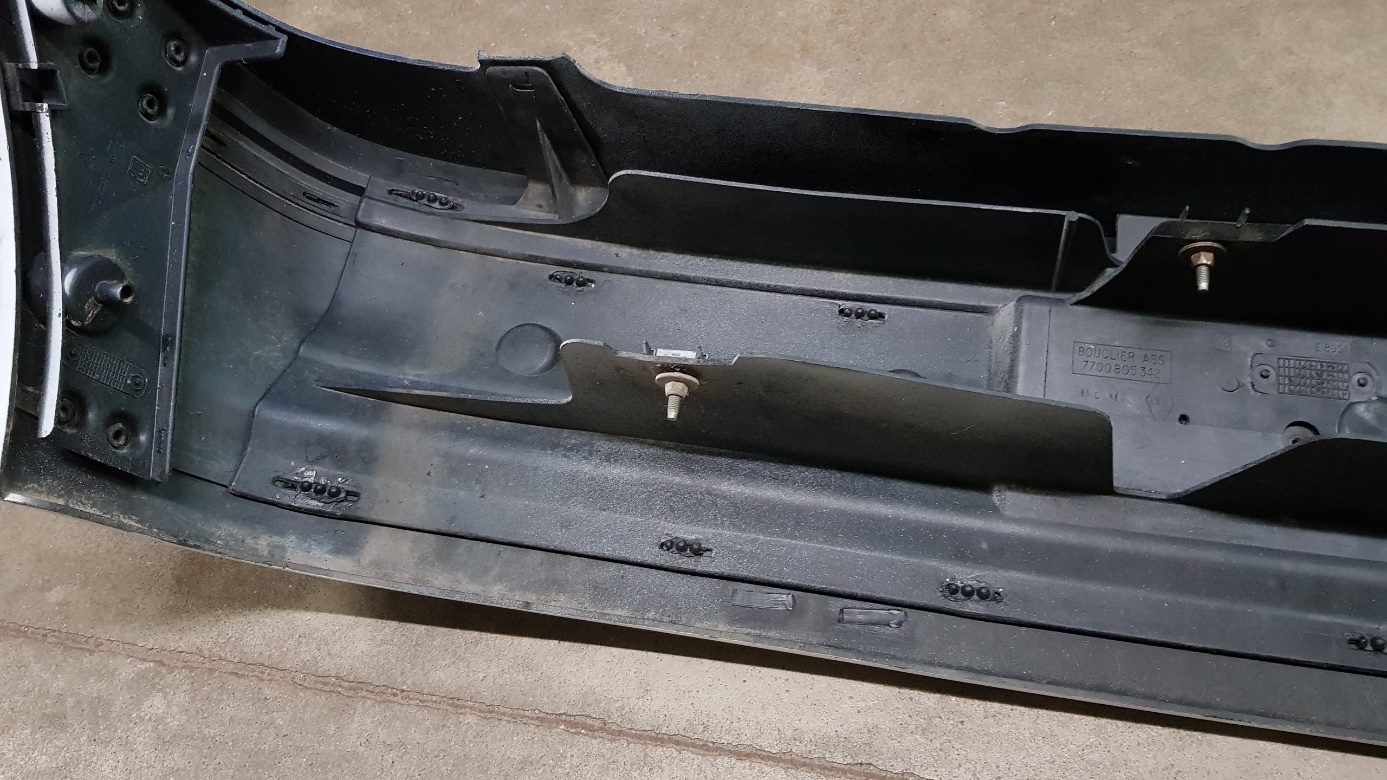
Detail of Renault rear bumper with fixed bumper reinforcement and left mounting slide.
Some of them are mounted to the bumper shell by means of detachable fasteners (bolts, screws, clips, hooks). However, many of them, especially found in older cars, are attached with plastic welds (let's call them "plugs") that are hot-formed when assembling the complete bumper. The welds are made of the same material as the bumper shell. In the process of bumper repair, it is often necessary to disassemble some of its elements, which are fixed by welds, and to reassemble them.
How to reinstall such an element? What materials / tools to use? How to make welds with a structure similar to the factory ones?
About it the following article, which will show how to construct and re-perform assembly welds in a manner similar to the factory.
As an example of such reconstruction / repair, we will use the front bumper from Renault Clio I, from which the left and right halogen mounts were removed for repair.
Originally, the halogen mounting was attached to 4 assembly welds, which had to be milled to the surface of the mounting frame.
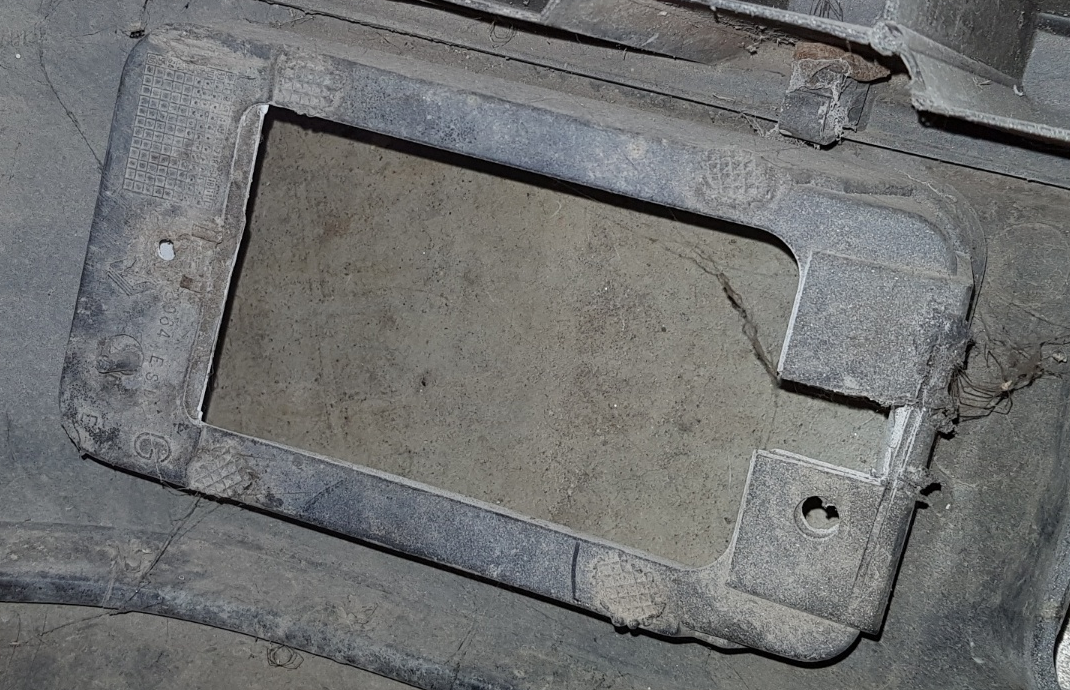
Projection of the halogen mounting element with 4 mounting welds marked.
In order to reattach the frame to the bumper, it was necessary to visualize how such assembly welds are formed. The weld holding the other element and attaching it to the base element (e.g. a frame to a bumper) is made of the same material as the base element. It is shown in the picture below showing the 3 stages of the weld formation:
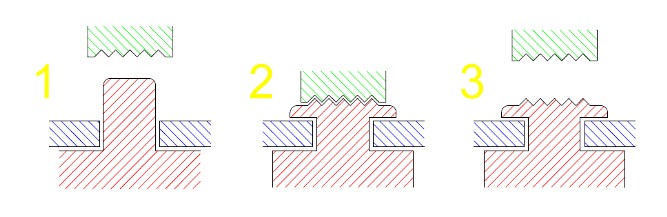
Formation of the assembly weld:
1 - Heating the mounting lug (red element),
2 - Forming a weld by squeezing the protrusion with a stamp,
3 - The weld is cooled down and the clamp is released
Before making the proper weld, it is necessary to rebuild the projections from which the weld will be formed by padding the plastic with the method of heat welding. For surfacing plastic, we can use, for example, the AT-852D box welding machine. In the case of this element made of a mixture of PP + EPDM + M10, the PP-U (PP + ET3X) binder was used as the binder with the best adhesion and welding temperature within 365 degrees. Plastic surfacing was preceded by sanding the remains of the protrusions to remove the residual varnish on the element and create a bevel on the surface of the protrusion so that the surfaced plastic has a larger surface to which we weld it.
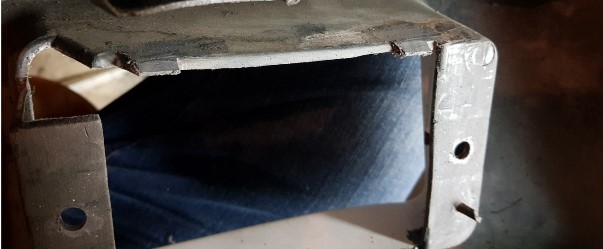
Mounting lugs, after their chamfering and grinding, are prepared for surfacing plastic
After such preparation of the surface of the protrusions, we can start padding them with the appropriate binder to obtain the appropriate length. In order for the binder to be arranged in the form of a flat surface and at the same angle as the protrusion, a flat plate or aluminum tape can be used as a base (several layers for greater thickness). After surfacing the plastic, we will get a similar picture as below:
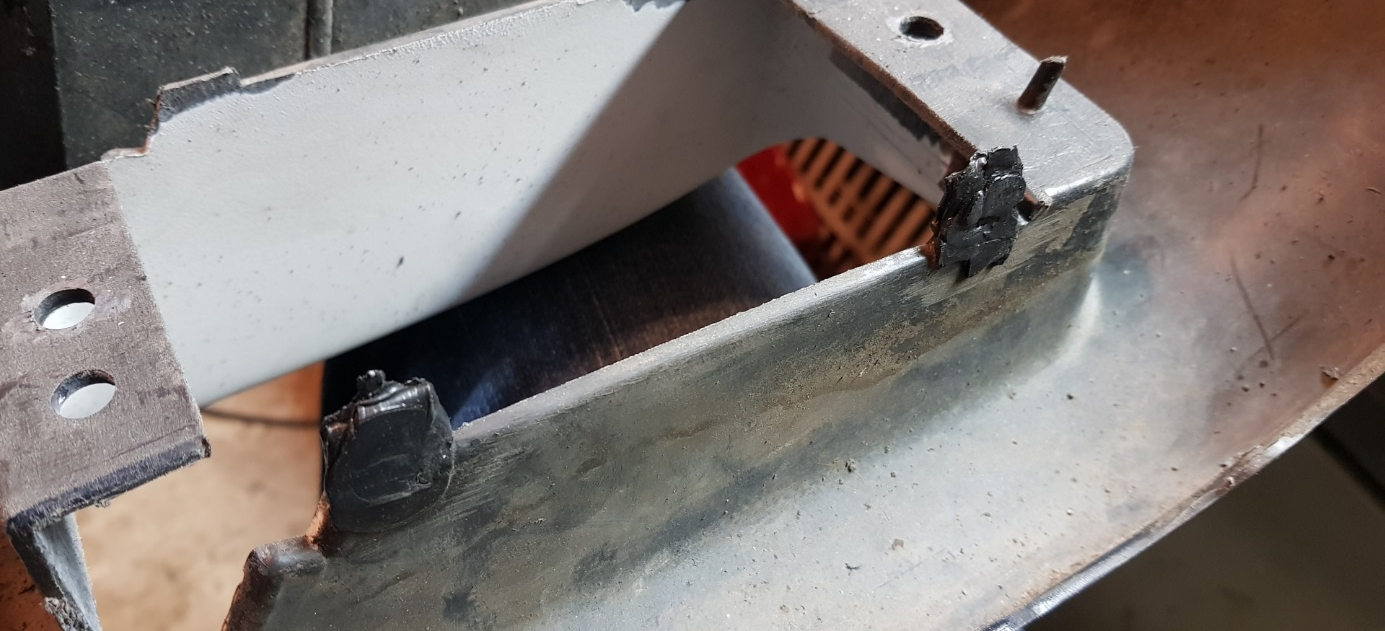
Assembly projections after surfacing the material before final processing
In order to obtain the correct shape of the protrusions, we grind them with cutters, sandpaper and, if necessary, correct the shape with a knife. The end length of the protrusions should be large enough to enable the welds to be of the appropriate thickness and width after they are flattened. In this case, the mounting lugs projected about 1 cm above the surfaces of the element to be fastened.
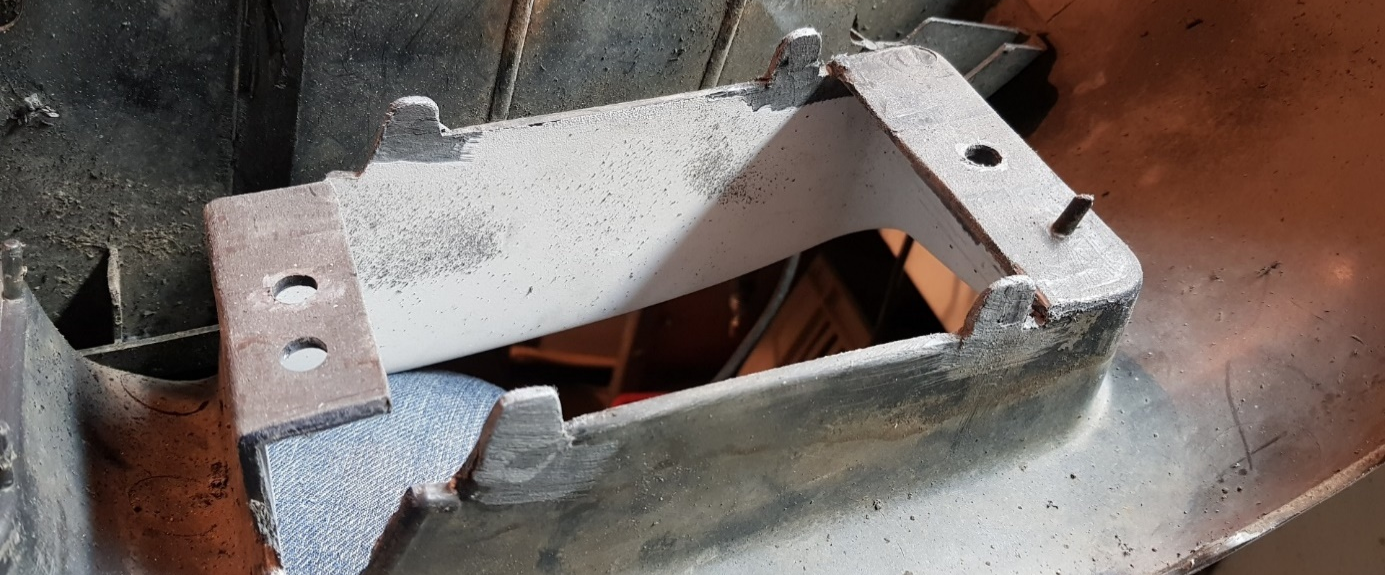
Assembly lugs after final machining of the shape
After making sure that the element that we want to permanently fix in a given position falls freely into the position of the positioning elements, we proceed to create fixing welds. the material of the component itself has not melted. Aluminum tape with high temperature resistance (temporarily up to over 500 degrees) was used for protection.
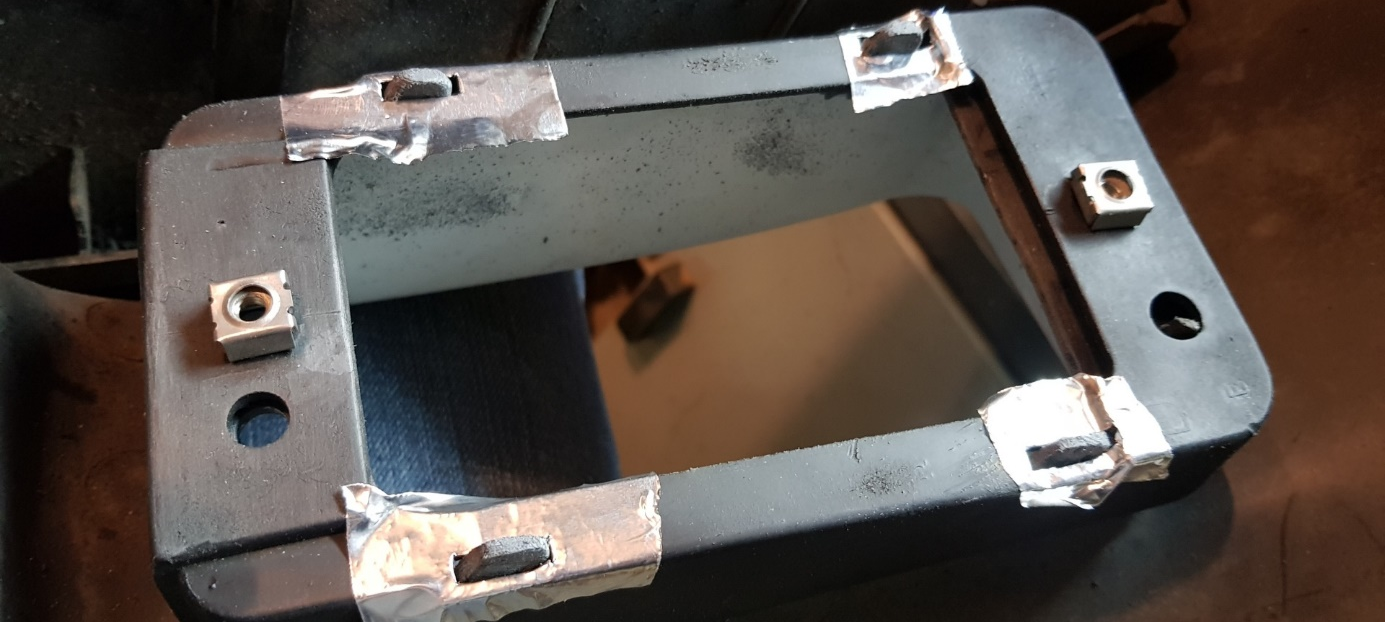
Mounting frame with sealed surfaces that may be exposed to high temperatures generated by the welding machine
The last step before the final welds was made was to make a stamp that would reproduce the factory shape of the fixing welds. To make such a stamp, an oval-shaped piece of polyamide was cut out, and then a mesh of intersecting cuts was milled on its surface. The final shape of such a stamp is shown below.

The final shape of the stamp forming the fixing welds
In order to properly form the welds with a stamp, the mounting lugs were heated to the melting point of plastic, i.e. about 365 degrees, using a welding machine. The protrusions should be heated evenly so that the temperature is uniform throughout their section - This can be easily seen by observing when the assembly protrusion begins to become malleable and begins to tilt under the influence of hot air.
After the protrusions were heated, they were pressed from above with a stamp so that there was no "play" between the weld surface and the frame surface. After all 4 welds have cooled down, the frame is installed rigidly and correctly.
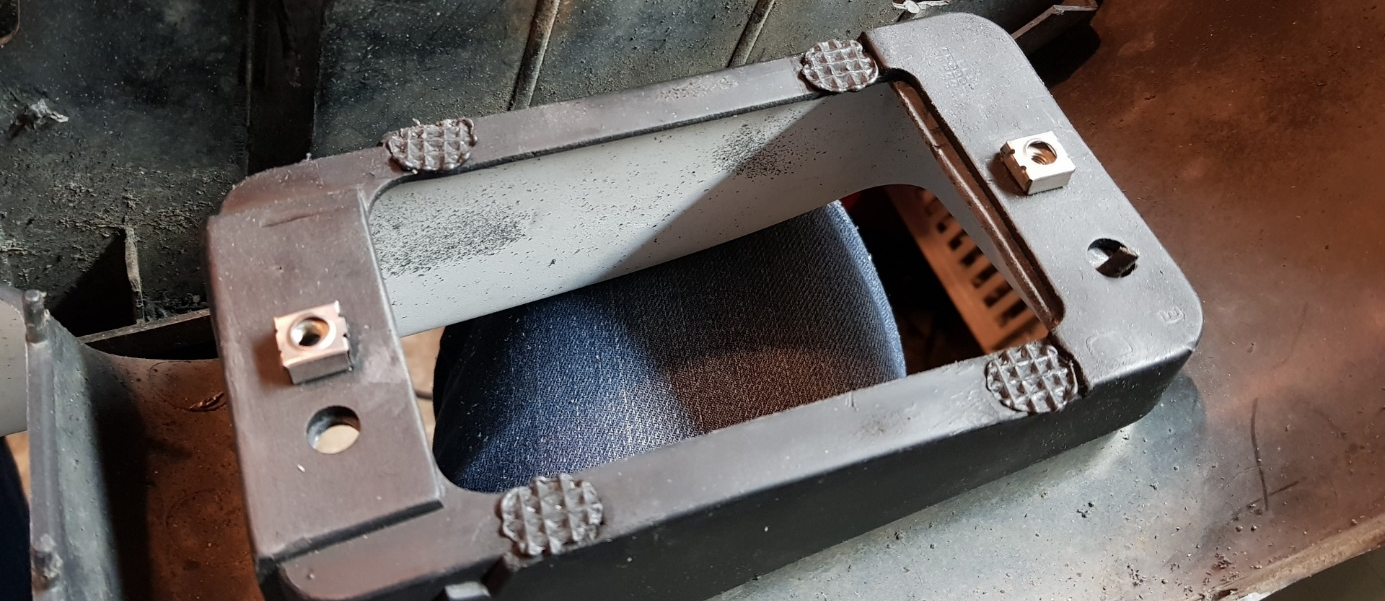
Correctly made assembly welds on the frame surface
Autor: Adam Dmitriew (@6Nylon)
Comments