Regeneration of metal surfaces
06-12-2021
0
In the next part of metal bonding, we will cover the repair and regeneration of metal parts, such as:
- cracks in oil pans, engines, bodies, fuel tanks,
- repairing holes in steel and copper pipes,
- regeneration of tanks and steel barrels,
- repair of metal surfaces against cavitation and corrosion,
- repair of welded elements that are already leaking or leaking,
-regeneration of manufactured shafts, bearings and threads
The types of metals from which the above elements are made are:
- "standard" steels, stainless steels and acid steels
- aluminum and duralumin - the so-called all his feet
- non-ferrous metals copper, brass, bronze
- cast iron and its alloys
What techniques will we discuss:
- bonding metals
- welding and soldering of the above elements.
We will point out the pros and cons of individual technologies.
For your convenience, we will divide these types of repairs into 3 types. What product we will use is not a problem here, so we will discuss the approach to repair.
The main problems that arise:
1. all kinds of metal cracks - (we will describe this problem in detail in the article below.)
2. regeneration of manufactured elements - filling losses in metals
3. protection against cavitation, abrasion and corrosion
How to repair metal cracks?
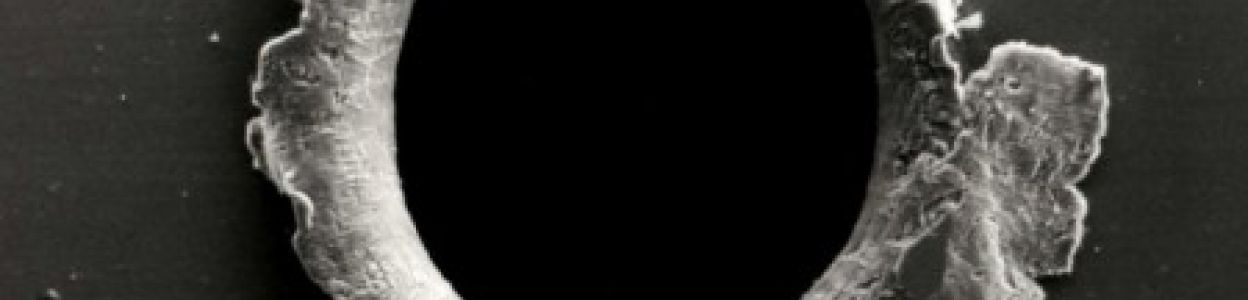
All kinds of cracks in metals are generally made in the same way, regardless of whether it is a crack in the oil pan, engine body, broken steel barrel pipe or aluminum and copper radiator. Follow the bonding instructions for metals below:
A preliminary cleaning of the surface (if it is contaminated with oils, greases, etc.) - clean it with a pressure washer, paper towel soaked in acetone or alcohol, and in industrial plants regenerating parts with an ultrasonic cleaner.
B grind the surface - with a grinder, sandpaper, file, at home, with a wire brush, and you can even use sandblasting or shot blasting - mainly to remove mechanical impurities, oxides and any old paint and varnish coatings. We do the whole thing 2-3 cm around the crack - the surface cannot be smooth.
C cut the surfaces - deepen the scratch to 3/4 of the wall thickness, if it is below 2mm, it is only slightly visible. We use a manual milling machine with a milling cutter suitable for metal.
a) for soft metals such as aluminum, duralumin, copper, brass and bronze - medium cut cutter;
b) when machining steel, stainless steel and cast iron - milling cutter with many dense cuts;
If someone is experienced, he can use a rubber band - but it's best to reduce the speed so that the material is not damaged excessively.
D - In the case of walls over 2-3mm - you should drill through the ends, thread a hole for the screw literally 3-4M and screw the screw with the thread glue type ATK LOCK 42. You can cut off the "head" at once, but it is not necessary. This point is to ensure that the crack does not move any further - we must remember that the bonded adhesive will not move any further if the cracking of the surface continues and the drilling is to prevent it. Of course, with walls of 1-2 mm, as in an oil pan or on pipes, the crack will not move - simply saying "not enough material".
E- chemically degrease the surface with pure acetone or propylene alcohol - spray it on the surface and wipe it thoroughly until the surface of the towel is clean after wiping.
F it is advisable to slightly heat the surface - especially if we repair in winter. The surface during gluing and bonding for the first few hours should be 15-20 degrees. (the exception is when after applying the glue we heat 50-100 degrees for about 30-1h - then the bonding occurs several times faster.
- if we have a gap greater than 2-3 mm:
a) first we use a thin layer of glue, which we put into the gap so that it binds the glue and then when rubbing it does not "fly" to the other side; or:
b) we use ATK METALFIX mass for kneading - in the form of plasticine which we push into the hole. This action makes us the basis for further work,
c) with large openings, a piece of the same metal can be inserted as a wedge, which will remain permanently; lubricating, of course, with the glue we use to repair.
H - we mix the two-component adhesive in appropriate proportions and depending on the material, so that it is enough to cover at least 2-3 mm of the adhesive thickness:
- copper, brass, bronze - KEMISPOX MED21 - bronze color! (we mix 4: 1)
- aluminum, duralumin and other alloys - KEMISPOX AL21 (mix 4: 1)
- steel, stainless steel, acid, cast iron, etc. ferrous metals - KEMISPOX FE21 (mix 3: 1)
NOTE: Remember to mix the base itself (the heavy one) before you mix it with the hardener because the liquid components may separate from the solids - normal behavior for this type of adhesives. Take the ingredients from the packaging with separate chopsticks. We rub the adhesive into the surface with thinner layers so as not to leave air trapped, especially at the first layer, and the adhesive adheres well to the surface.
If the repair is greater than approx. 5-7 cm, or there is an additional pressure greater than 2 bar, then after the first or second layer, we embed the reinforcing mesh - it aims to strengthen the entire structure (such as concrete and reinforced concrete) and allows for easier increasing the thickness of the applied adhesive. Of course, we can use the mesh always remembering that it should be min 1 cm wider than the crack or hole we are repairing
And - after application, it is worth heating the whole thing slightly, e.g. with a heat gun, dryer, etc., which gives a minimum of 50 degrees or even 100-150 (no more), thanks to which the glue will become slightly smoother and penetrate into small gaps that we could avoid - remember, however, that when vertical repairs should only be slightly heated so that the whole does not become liquid enough to run off the surface. The exception is when you perform repairs in a horizontal position.
J - we leave everything for 24 hours to bond (unless we heat the surface - as in the instructions for glue) - then the whole thing can be ready even in 2 hours. After fully hardening it is recommended to reheat the whole thing. Then the product will acquire 100% of its properties.
We will also present a second method for repairing metal cracks. We use it in cases where we have high pressure or we want to protect the element against impacts.
A - Prepare the surface as above,
B - prepare a piece of sheet metal or a half-tube larger than a few to several centimeters from the crack / cavity,
C - It is best if the metal is the same as the part to be repaired (i.e. steel for steel, aluminum for aluminum, and copper for copper / brass),
D - Remember about a fairly good fitting of the elements - after pressing, the sheet must not stick out for more than a few millimeters. (of course, in such cases, increase the amount of glue required),
E - grind the surface of the sheet and degrease it,
F - we apply a thin layer of glue on both surfaces by rubbing; and a larger amount of product in the center of the sheet along the crack,
G - fasten with pressure or clamping belts so that, especially in vertical positions, the sheet does not slip during binding.
Do you have any doubts or questions regarding metal bonding? - write or call - we will answer all your questions! Of course we are prepared for some of them and here is a small list:
What if the steel barrel later comes into contact with drinking water or food?
Here we have 2 methods: no matter what metal we repair, we use KEMISPOX AL21, which is approved for drinking water, or in places of contact with the product, we paint the surface with paint / varnish with a drinking water / contact with food certificate.
The fuel tank is in contact with gasoline or oil (diesel), what then?
No problem because the above adhesives are resistant to gasoline, oil, grease, crude oil, diesel, etc. For a full list of resistance, see the instructions for the product.
Glues the body of aluminum and it must withstand high temperature, what then?
Also no problem. The adhesives are resistant to continuous operation even up to 200 degrees, also especially with aluminum, the elements do not heat up above 100 degrees and only in special cases the temperature briefly reaches 120-130 degrees.
What can I do with this surface later?
After the final heating, you can sand the whole thing because, for example, you want to have a even surface or you have applied too much and the element cannot fit into the other one - no problem remembering that, depending on the strength, the surface should be .2-3mm. - or be equal to the wall thickness we make.
Why are these products so good?
KEMISPOX products have been manufactured for over 30 years and are constantly being refined and improved, used in production plants to regenerate even new parts after castings.
How do they differ from similar ones on the market?
Most similar products are either weaker or have a lower temperature - usually up to 120 degrees because they are based on old tech epoxy resins and are not modernized. The price is often the same or higher than that of KEMISPOX, additionally as the few on the market, they have a metallic color (over 60%! Metal content), therefore after setting they behave like metal and can be fully called liquid metals. How to tell the difference? Kemispox weighs 2.6 g / cm3 - the higher the weight, the greater the metal content and the stronger the product.
I will take off the zinc or paint, what about corrosion?
The adhesive is a product that cuts off the air at the point of application. The access of moisture is closed. Therefore, where there is glue, there is no corrosion. After the repair, if you want or it requires a further stage - you can paint, put on a putty, etc.
What if the element has already welded and is still flowing?
No problem, it happens very often because with cracks in steel, especially aluminum, it is difficult to weld thin or very thick elements to keep them tight and prevent deformations and surface degradation. In that case, you perform the repair in the above sequences, except that you do not have to provide a mesh, a good rubbing of the adhesive, 2-3 mm thick, or the second method with sticking a sheet / half-tube is enough.
Finally, a few more comments why we propose gluing and not welding, fusing or soldering.
In home conditions, tight welding or fusion welding is basically out of the question. It is very difficult. If we want to decide on it, then we should immediately seal it with the selected KEMISPOX product after such a repair.
What about soldering?
Soldering is a much simpler technique, especially copper, brass and bronze, provided that we have a suitable burner, but the surface of the radiator is so thin that it is very easy to damage the surface, so it is safer to do it with glue, but if we have so much experience and want to take this risk, no problem, we can seal the kemispox MED21.
What about aluminum?
Aluminum and duralumin are quite special materials which, for example, in coolers have a very thin wall, which makes it even easier to damage than on copper, therefore it is safer to do it with AL21 glue by applying and heating it so that it melts with possible reinforcement of the half of the tube and pouring over the whole.
Saw a special aluminum soldering wire when we use it?
You can see such aluminum solder here. This has a good effect especially when you are using MAP gas. It is best to test on unnecessary material. Remember that there is always a risk of damaging the surface. Practice, precision and skill are required here.
Comments